Capturing the perfect photo often requires more than just pointing and shooting. Whether you’re trying to snap a group photo, a solo selfie, or a stunning landscape, the iPhone 13’s camera timer is a game-changer for hands-free photography. This feature allows you to set up your shot, get into position, and capture the moment without needing someone else to press the shutter. In this comprehensive guide, we’ll walk you through how to set a photo timer on your iPhone 13, share tips for getting the best results, and explore why this feature is a must for both amateur and seasoned photographers. By the end, you’ll be ready to master timed photography and elevate your iPhone 13 photography game.
Why Use the iPhone 13 Camera Timer?
Before diving into the steps, let’s explore why the iPhone 13’s camera timer is such a valuable tool. The timer feature, built into the native Camera app, allows you to delay the shutter by 3 or 10 seconds, giving you time to join the frame or stabilize your shot. Here are some key benefits of using the timer:
- Perfect Group Shots: Include yourself in group photos without the awkward arm stretch of a selfie or relying on a stranger to take the picture.
- Reduced Camera Shake: Pressing the shutter can cause slight movements, leading to blurry photos, especially in low-light conditions. The timer eliminates this issue by allowing the camera to settle before capturing the image.
- Creative Self-Portraits: Use the rear-facing camera, which offers superior image quality compared to the front selfie camera, for high-quality self-portraits.
- Stunning Landscapes and Macros: For landscapes or close-up shots, the timer ensures stability, reducing blur and enhancing clarity, especially when paired with a tripod.
- Night Photography: In low-light scenarios, the timer helps capture crisp images by avoiding movement during the longer exposure times required for night mode.
By understanding these advantages, you can see why the timer is essential for taking your iPhone 13 photography to the next level. Now, let’s get into the step-by-step process.
Step-by-Step Guide: How to Set a Photo Timer on iPhone 13
Setting the camera timer on your iPhone 13 is straightforward, but the controls may not be immediately obvious. Follow these steps to activate and use the timer in the Camera app:
Step 1: Open the Camera App
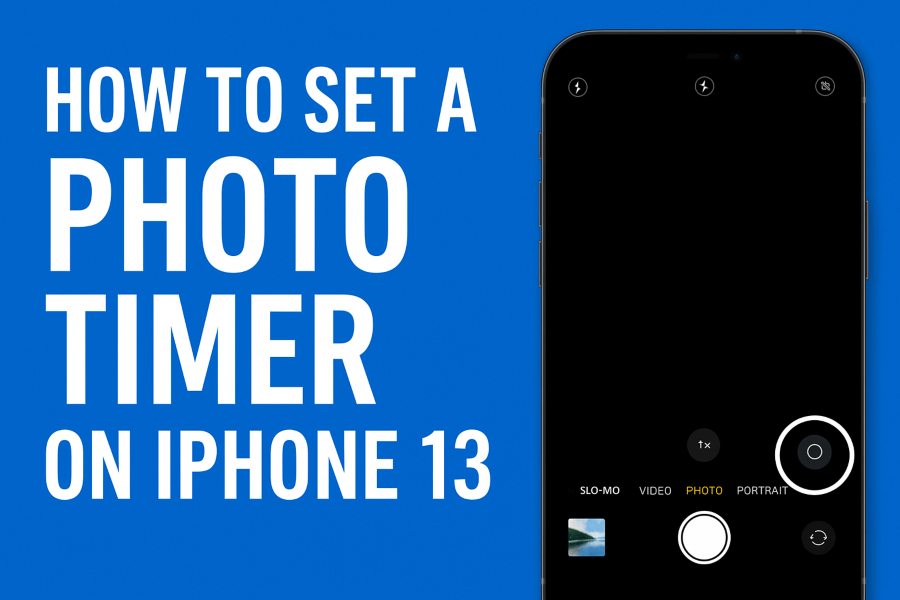
Unlock your iPhone 13 and locate the Camera app on your home screen or in the app library. Tap to open it. Ensure you’re in Photo mode, as the timer is available only in Photo and Portrait modes, not in Video, Slo-mo, Pano, or Time-lapse modes.
Step 2: Access the Timer Settings
Once the Camera app is open, look at the top of the screen for a small up-arrow (chevron) icon, just below the notch. Tap this arrow to reveal additional camera settings. Alternatively, you can swipe up on the mode menu (the horizontal menu at the bottom of the viewfinder) to access the settings strip.
Step 3: Select the Timer Option
In the settings strip, swipe left until you find the timer icon, which looks like a clock or stopwatch. Tap the timer icon to display the available options: Off, 3s (3 seconds), or 10s (10 seconds). Some sources also mention a 5s option on newer iOS versions, so check if your device offers this.
Step 4: Choose Your Timer Duration
Select either the 3-second or 10-second timer based on your needs:
- 3-second timer: Ideal for landscapes, macro shots, or solo photos where you’re already close to the camera. It’s also great for minimizing camera shake in low-light conditions.
- 10-second timer: Perfect for group shots or self-portraits where you need time to run into the frame or adjust your pose.
Once selected, your timer setting will appear in the upper-right corner of the viewfinder, indicating it’s active.
Step 5: Set Up Your Shot
Position your iPhone 13 on a stable surface, such as a tripod, table, or stack of books, to ensure a steady shot. If you’re using a tripod, position it at eye level for the best results, though you can experiment with creative angles. Frame your shot carefully, ensuring all subjects are in view and the composition is balanced. You can enable gridlines (Settings > Camera > Grid) to help with alignment using the Rule of Thirds.
Step 6: Start the Timer
Tap the shutter button to initiate the countdown. You’ll see a countdown timer in the viewfinder, and the iPhone’s flash will blink in sync with the countdown, helping you track the time even if you’re using the rear camera. Hurry into position if you’re joining the shot! When the timer finishes, the camera will automatically capture the photo.
Step 7: Review Your Photos
By default, when the timer is used with Live Photos turned off, the iPhone 13 captures a burst of 10 photos to ensure you get the perfect shot. To review, tap the thumbnail in the bottom-left corner of the Camera app to open the Photos app. If burst mode was activated, you’ll see “Burst (10 photos)” at the top. Scroll through the images, select the best one by tapping it, and choose Keep Only # Favorites to save your preferred photo or Keep Everything to retain all shots.
Step 8: Disable the Timer
The timer remains active until you manually turn it off. To disable it, tap the timer icon again and select Timer Off. This ensures your next photo is taken instantly when you press the shutter.
Tips for Using the iPhone 13 Camera Timer Effectively
To make the most of the timer feature, consider these expert tips to enhance your photography:
1. Use a Tripod for Stability
A tripod is a must for sharp, professional-looking photos, especially in low-light or night mode, where the shutter stays open longer. A budget-friendly tripod or a Bluetooth remote can make a big difference. Position the tripod at eye level for selfies or group shots, or experiment with angles for creative compositions.
2. Enable Gridlines for Better Composition
Turn on gridlines in Settings > Camera > Grid to align your shots using the Rule of Thirds. Place your subject where the lines intersect for a balanced, visually appealing photo. Check the edges of the frame to avoid cutting off heads, hands, or feet.
3. Adjust Focus and Exposure
Before starting the timer, tap the screen to set the focus point and adjust exposure by dragging the slider up or down. For group shots, ensure all subjects are at a similar distance from the camera to keep everyone in focus. Lock the focus and exposure by holding the screen until you see AE/AF Lock.
4. Use Burst Mode Strategically
When Live Photos is off, the timer automatically triggers burst mode, capturing 10 photos. This is great for group shots where someone might blink or move. To disable burst mode, turn on Live Photos or enable the flash, which forces a single shot.
5. Optimize for Night Photography
For night photos, the timer is essential to reduce shake during long exposures. Pair it with a tripod and ensure your subjects remain still, as night mode requires longer capture times.
6. Experiment with Live Photos
With Live Photos enabled, the timer captures a 3-second video clip instead of a burst. You can convert this into a long-exposure shot for creative effects, like smooth waterfalls or light trails. Go to Photos, select the image, tap the Live icon, and choose Long Exposure.
7. Use an Apple Watch as a Remote
If you own an Apple Watch, open the Camera Remote app to trigger the shutter remotely, giving you more control over your timed shots.
Common Scenarios for Using the Timer
The iPhone 13 camera timer is versatile and can be used in various situations:
- Group Photos: Get everyone in the frame without needing an extra person to take the photo. Use the 10-second timer to give yourself time to join the group.
- Self-Portraits: Capture high-quality self-portraits with the rear camera for better lighting and detail. Set up the shot with a tripod and use the 10-second timer.
- Landscape Photography: Eliminate camera shake for crisp, clear landscapes, especially in low-light conditions. Use the 3-second timer with a tripod.
- Macro Photography: Stabilize close-up shots of flowers, water droplets, or other small subjects to maintain sharp focus.
- Night Photography: Reduce blur in low-light shots by using the timer with a tripod to keep the camera steady during long exposures.
Troubleshooting Common Issues
If you encounter problems while using the timer, here are some solutions:
- Timer Option Missing: Ensure you’re in Photo or Portrait mode, as the timer isn’t available in Video, Slo-mo, or other modes. Update your iOS to the latest version if the option is still missing.
- Unwanted Burst Mode: If you don’t want 10 photos, enable Live Photos or turn on the flash to capture a single shot.
- Blurry Photos: Use a tripod or stable surface to prevent movement. In low-light conditions, ensure subjects stay still during the exposure.
- Timer Stays On: Remember to manually disable the timer by selecting Timer Off after use, as it remains active until turned off.
Exploring Third-Party Camera Apps
While the native Camera app is user-friendly, third-party apps like Photo Timer+, Slow Shutter Cam, GorillaCam, and Pro Cam 8 offer advanced timer features, such as custom intervals, multiple shots, or time-lapse options. These apps are ideal for photographers seeking more control over their timed shots. Check the App Store for reviews and compatibility with your iPhone 13.
SEO Optimization Tips for Photographers
Since this blog post is designed to be SEO-friendly, here are some tips for photographers looking to optimize their own blog posts about iPhone photography:
- Use Targeted Keywords: Incorporate keywords like “how to set a photo timer on iPhone 13” naturally throughout the post, including in the title, headings, and meta description.
- Optimize Images: Resize images to 1500px on the short edge (or 2000px for banners) to improve site speed. Use descriptive alt text, such as “iPhone 13 camera timer settings,” to boost image SEO.
- Structure with Headings: Use H1 for the main title and H2/H3 for subheadings to improve readability and SEO.
- Add External Links: Link to authoritative sources, like Apple’s official support page, to enhance credibility.
- Engage Readers: Write in a conversational tone and include actionable tips to keep readers on the page longer, reducing bounce rates.
Conclusion
The iPhone 13’s camera timer is a powerful yet simple tool for capturing professional-quality photos without needing extra hands. Whether you’re snapping group shots, self-portraits, landscapes, or night photos, the timer ensures stability and flexibility. By following the steps outlined above and using our expert tips, you can master the timer feature and take your iPhone 13 photography to new heights. Pair it with a tripod, experiment with Live Photos, or explore third-party apps to unlock even more creative possibilities. Start capturing picture-perfect moments today!
For more iPhone photography tips, check out Apple’s official camera guide or subscribe to photography newsletters like iPhone Life’s Tip of the Day.